Lateral root induction with Arduino
How to use a simple programming Arduino device to simplify biologists life
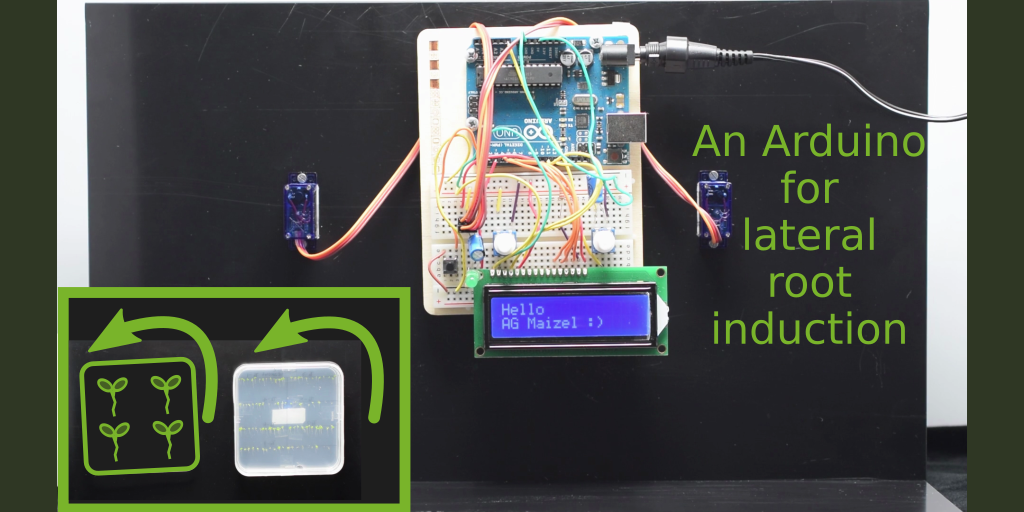
An Arduino to induce lateral roots when you’re sleeping
In my current lab, we are working on the formation of lateral roots of the model plant Arabidopsis thaliana. For some experiments, we need to observe precise events of the development in a large population of plants, or to synchronize the development of lateral roots over many plants. To do so, we can turn the plant upside down. As the apex of the root is always trying to point toward the floor, it will bend. In the U-bend of the primary root, a new lateral root will be triggered. The new lateral root will start being visible at the microscope a couple of hours after this gravitropic stimulus, and will develop at a known pace until full emergence from the primary root (around 48h later). Problem is that for some experiments, we need to turn the plant in the middle of the night. To avoid going to the lab at indecent hours, we may use this Arduino device to do it right on time.
What is Arduino?
Arduino is a programmable microprocessor that can be connected to some electronics elements such as an LCD screen or motors to create automated devices. The low price of the electronic components, its abundant documentation, and freely available software makes it quite popular among inventors and artists.
A first version was reported missing
My group leader had made a first simple Arduino device rotating one Petri dish upside down. It had one servo and was connected to an electric timer. For defined hours, the timer would let the Arduino being powered, which would trigger the rotation of the servo. Unfortunately, when I joined the lab, this device had vanished, as well as its code.
A new Arduino to replace the missing one
I discovered the Arduino system while doing an art and science project during my PhD. I was part of a group of four PhD students from various backgrounds, a freelance designer and an art student. At that time, we used an Arduino to make a press button that would randomly trigger an LED and surprise, but also question the visitor of the exhibition. I saw it build but I did not made it myself. When I got the occasion again to try the Arduino system, I volunteered to build a new device for my lab. As nothing was left from the previous one, not even a picture, I had to imagine a brand new version. I decided to make the best use of the different components of the Arduino starter kit: I replaced the electric timer by a countdown and an LCD screen. I originally designed the system for one servo. At the very end of the project, my boss and I tested and added a second servo in parallel.
For the programming part, I got inspired by two of the Arduino starter kit projects, and two other online tutorials. The Crystal Ball Arduino project helped me understand the LCD screen, and the Mood Cue, the rotation of the servo. I then searched for more tutorials to add the button/LED combination and the countdown function. I found the information I needed on a basic tutorial from the “Site du Zéro” [https://openclassrooms.com/courses/programmez-vos-premiers-montages-avec-arduino/le-bouton-poussoir], and on a blog explaining how to add a startime preselection on an old washing machine [http://colin.pitrat.free.fr/?p=393].
I also visited the FabLab on the Wageningen university campus. There I could discuss the difference between servo and motors, and also, the different ways to power the Arduino, since it would be located in a growth chamber.
How is it working?
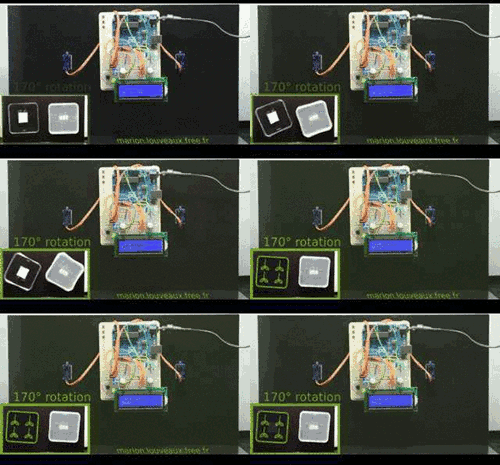
The LCD screen display invites the user to set the time for the countdown, which can be adjusted by turning the right potentiometer. The left potentiometer controls the LCD backlight. To start the countdown, the user presses the press button. The countdown starts on the LCD screen and the LED turns ON. When the countdown is over, the LCD screen displays an end message and the two servos rotate at 170 degrees.
Video
A 1min video presentation of the device:
Acknowledgments
I would like to thank Pr. Dr. Alexis Maizel for giving me the opportunity to build this Arduino device and sharing his original idea of the system. I would also like to thank the COS workshop for building a stand for the Arduino device. And I would like to thank StatnMap for helping me debugging the system and helping me making this great tutorial video.
Citation:
For attribution, please cite this work as:
Louveaux M. (2017, Oct. 10). "Lateral root induction with Arduino". Retrieved from https://marionlouveaux.fr/blog/lateral-root-induction-with-arduino/.
@misc{Louve2017Later,
    author = {Louveaux M},
    title = {Lateral root induction with Arduino},
    url = {https://marionlouveaux.fr/blog/lateral-root-induction-with-arduino/},
    year = {2017}
  }



Share this post
Twitter
Google+
Facebook
LinkedIn
Email