Candy phenotyping
Teaching image and data analysis with candies
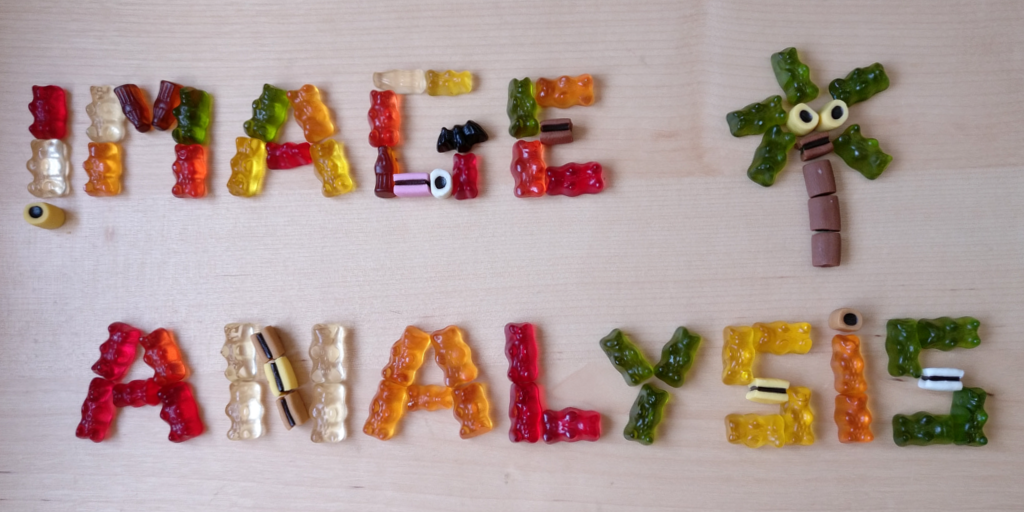
Teaching image and data analysis requires to choose an example dataset. Finding a simple numerical and/or text dataset is usually not an issue: such data can be found online, in public databases, or along with the analysis software, as this is the case with the library {datasets} of the statistical software R. Some of these datasets are even already well-formatted and ready to use to teach data exploration and visualization. But finding a suitable image dataset can be more difficult, especially if one wish to combine it with corresponding text/numerical data. In this case, one might need to create it’s own dataset for teaching. As data collection and database formatting have a direct impact on data analysis, I would strongly recommend to include these steps in image and data analysis courses.
Collecting ‘real’ data for teaching can be tricky. It costs time, but it can also costs money, and even raise issues regarding the respect for anonymity. A colleague researcher in St Louis (US), Dan Chitwood, found a good compromise: he asked his students to collect images and data from candies. The candies were photographed by the students. Their nutritional values, as well as their name and type (‘chocolate’, ‘liquorice’…) were copied by the students in a database. Extra information concerning the aspect of the candies or ‘phenotype’ were later deduced from the analysis of the pictures. I had the occasion to give twice a similar course, based on Dan Chitwood’s original idea, together with the Pr. Alexis Maizel at the University of Heidelberg. I explain here the main idea of this course and point out its specificities and added value.
Images and data collection
Candies are bought at the supermarket. Candies can be liquorices, jelly beans, caramels, marshmallow, but also chocolate bars, chocolate truffles… They are preferentially packaged by candy type, and not mixed. The package displays the nutritional values. The data collection consists of several steps. First, all candy packages are given a unique identifier (‘ID001’, ‘ID002’, ‘ID003’…). Second, all candies are photographed. To do so, we prepared a table covered with a white or a dark sheet of paper to contrast with the candies, a photo stand to bring the camera above the table, a ruler to get the scale, and the ID labels. Students were asked to photograph 15 to 20 candy from the same package at a time. Third, students were asked to copy the nutritional values and candy IDs into an online Google Spreadsheet.

Figure 1: Pictures of candies taken during the course by Dan Chitwood’s students (left) and our students (right).
As in any practical course, nothing happened exactly as planned. Some of the packages contained mixed candies, in terms of shape and/or colour, even if they shared the same nutritional values. On the pictures, not all candies were oriented the same way, some were not entirely in the frame of the camera, and some were touching one another. And the white sheet of paper used as background was quickly covered by spots of chocolate. Moreover, the nutritional database was not well-formatted. Company and candy names were spelled in many different ways, such as Nestlé, nestlé, nestle… or even contained typographical errors. We had given no instruction regarding the use of accents. With the german names of candies, containing ä, ö or ü, this led to many variations around the same word. This lack of homogeneity was enhanced since students simultaneaously entered their data on the online spreadsheet. I think that such ‘issues’ should not be avoided. They are part of the hassle of ‘real’ data collection. One need to go through the analysis of the data to realize how much mixed, clustered or misoriented candies can hinder the image analysis, and how much the lack of homogeneity between names in a database is detrimental for further data analyses.
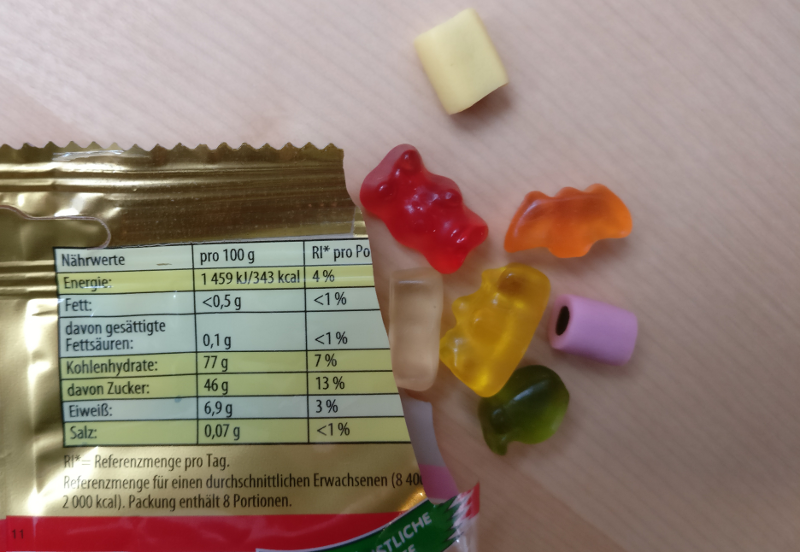
Figure 2: Nutritional values on a candy package.
Image analysis with Fiji
The image analysis course was conducted with Fiji. Students were true beginners concerning handling of Fiji and image analysis. We gave an introduction on what is an image (8 bits versus 16 bits, what is a LUT, how to adjust brightness and contrast…), what is a stack and an hyperstack, how to measure manually the features of objects in an image (how to change the image properties and add a scale, what is a Region Of Interest, how to use the measurement tools…), and how to segment an image using appropriate filters and thresholds. The final goal of the course was to segment the pictures of candies in order to extract average measurements of area, as well as shape descriptors (one mean value per candy ID). We divided the work between students, each being assigned only a few images to segment. Aside from the segmented output image, we also asked them to to share their segmentation technique, for instance which filter they applied, if they needed to split the RGB channels to apply the threshold only on one channel etc.
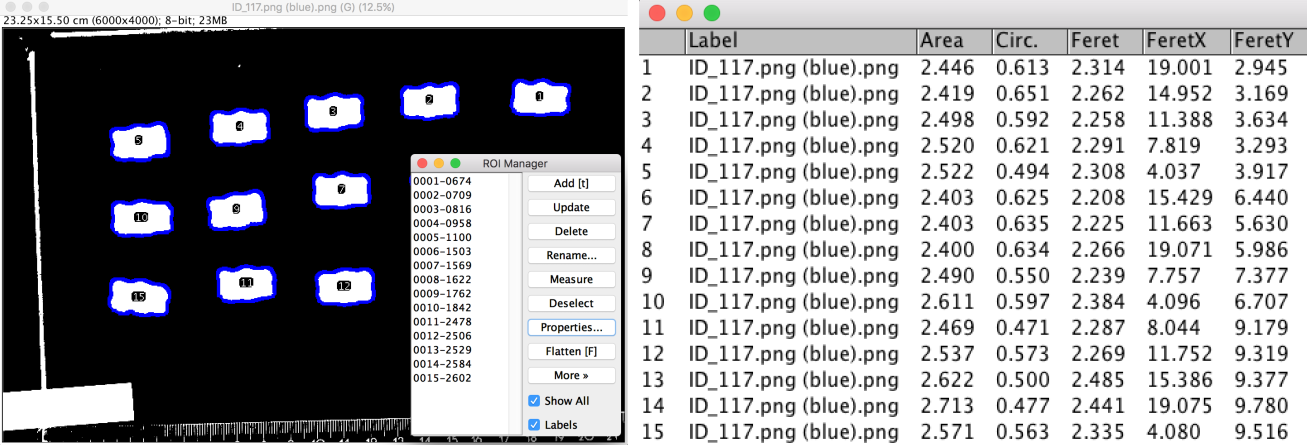
Figure 3: Image segmentation by thresholding in Fiji (left). Measurements are extracted from binary image (right).
Data analysis with R
Data analysis was conducted with the R statistical software. Students were true beginners concerning coding in R and data analysis. We gave an introduction to R using the table of nutritional values. The introduction was focused on how to load the nutritional table, how to check the quality of the database and correct mistakes, such as duplicated rows, non homogeneous names…, and on how to explore graphically the data using the library {ggplot2}. To guide the students, I wrote a course document in the Rmarkdown format, with the help of another postdoctoral researcher, Juan L. Mateo. I used a template inspired by a blog post written by Sébastien Rochette about conditionnal chunks. I made two versions: a complete one for the teacher(s), with all the code answers, and one with blanks for the students. We chose to start from the basics, with the definition of a vector and a dataframe. We did not talked about the libraries {dplyr} and {magrittr}. But now that I’ve read this blog article, I would like to try to include these librairies in the course.
# load("nutrition_tidy.Rdata")
library(ggplot2)

g1 <- ggplot(nutrition_tidy) +
  aes(x = calories_per_30g, y = total_carb_per_30g, colour = class) +
  geom_point() +
  theme(legend.position = "bottom")

g2 <- ggplot(nutrition_tidy) +
  aes(x=class,y=calories_per_30g, fill = class) +
  geom_boxplot() +
  geom_jitter() +
  guides(fill = FALSE)

gridExtra::grid.arrange(g1, g2, ncol = 2)
Going further - multivariate analysis and morphometric analysis
In its original course, Dan Chitwood also includes multivariate analysis. We did not go that far since the schedule was tight, and since the students were true beginners, both for Fiji and R. If I had had enough time, and/or if the students had already been familiar with the basics of R and/or Fiji, I would have included a few hours about Principal Component Analysis, using for instance the R library {FactoMineR}. For a more advanced course, I would have also included an introduction to morphometric analysis. In the image analysis part, we only included a few shape descriptors proposed by Fiji. If I had had more time and more advanced students, I would have introduced the R library {Momocs}. This library allows to extract mean shapes of each type of candy, starting from the binary masks obtained by segmentation. It also allows to run a Fourier Analysis in order to get a condensed description of the shapes of candies, and to perform multivariate analysis on the Fourier harmonics.
My tips
I would suggest to dedicate at least 18h to the whole practical course (roughly 9h for the acquisition of the images and Fiji, and 9h on R). This practical course is quite dense, especially if students are true beginners. Hence, I would strongly advise to spread the course accross several weeks, leaving at least 2 to 3 days in between two sessions of 3 hours. Since it can be risky to do the R course directly on the freshly acquired data, which might not be so well-formatted, I would advice to prepare and give the R course on the already existing dataset of Dan Chitwood, which contains a few, well-chosen flaws. The nutritional database created during the course, potentially more messy, can be used to re-apply the freshly acquired knowledge, in a homework or a final assessment.
Acknowledgments
I would like to thank Pr. Dr. Alexis Maizel for giving me the opportunity to take part in the preparation and execution of this course, as well as Dan Chitwood for his original idea.
Citation:
For attribution, please cite this work as:
Louveaux M. (2018, May. 20). "Candy phenotyping". Retrieved from https://marionlouveaux.fr/blog/candy-phenotyping/.
@misc{Louve2018Candy,
    author = {Louveaux M},
    title = {Candy phenotyping},
    url = {https://marionlouveaux.fr/blog/candy-phenotyping/},
    year = {2018}
  }
Share this post
Twitter
Google+
Facebook
LinkedIn
Email